Pages

Showing posts with label collage art. Show all posts

Friday, July 13, 2018

Fairy Dreams

It is no secret that one of the things I love best about Altered Pages is the large catalog of digital collage images.  They can be used as a single focal image on a project or combined in a seemingly infinite amount of ways.  This greeting card today uses images from several different collage sets to create a sweet floral fairy scene.


I picked out three of my favorite images and cut each one out in detail.  There was a lot of white in both the daisy and fairy images so I grabbed my craft knife and started by pruning the daisies.  When I was satisfied with my trimming I used glitter glue on the daisy centers.  I printed off a second image so that I could mount the center flower on foam dots.


I ended up leaving some of the white toward the bottom because there were other things going on.  I added a white flower border and pale yellow Dew Drops to the bottom.  I find that when you're making a scenery card, it helps your eye to rest when there is a bottom base.  Using a floral border helps create the image of the fairy dancing in the garden.

The words were also mounted with foam dots.  A few butterflies as playmates for the fairy and  I've got a fun little note card.  


Products Used:
Graphic 45 6x6 Home Sweet Home paper pad
Bazzill border
Dew Drops
Stickles
Adhesive tapes and glues

Collages Used:
Fairy Dolls
Fairy Dreams
Daisies
Pretty Purple


Friday, January 22, 2016

Mixed Media Vanetine Heart

Hi everyone! I'm here today with a mixed media project, which is being featured today on the Altered Pages Artsociates blog.  I used a pressboard heart and created a decoration for the mantle.


Pressed wood is thirsty so I coated the heart with gesso before painting.  The gesso makes a nice base coat so that your paint goes on evenly and the color stays true.  After the base was completely dry, I squirted on three different colors/types of red paint.  One of the paints was glossy just to give the piece a little more texture and interest.  Then, instead of using a brush, I brayered the entire surface, which created wonderful lines and patterns.

And now the fun began!  I started by choosing the Queen of Hearts collage sheet and cut out one of the little beauties.  She is backed with a German scrap spiky flower and also sports a German scrap crown.  Black lace made a nice background to highlight the game tiles.  

This wooden heart will be free-standing with on a plate rack, but it could just as easily be turned into a wall hanging by adding a loop of ribbon  glued to the back.


Thanks for visiting today!  This project and many more can be found on the Altered Pages blog just by clicking HERE.

www.alteredpages.com
Visit Altered Pages.com for your art supply needs!
Supplies used on the mixed media heart:
Gesso
Brayer
Tacky Glue
Ribbon, lace and flowers (cut apart)
German scrap
Game tiles
Glitz giant rhinestone stickers
Dew Drops
Bazzill paper flowers
Collage images
   Queen of Hearts
   Valentine Faux Postage
   Mini Images Valentine


Wednesday, November 11, 2015

Butterfly Canvas

Hello friends!

This is an 8x10 canvas.  It was originally going to be for a group challenge on Facebook, but I never got it completed in time.  I've been working on this canvas off-and-on for months.  I bring it down off the shelf and tweak something then put it back.  I think I'm finally ready to share it.

There is a long list of products used and I'm not even sure I remember everything I've done to it.  I'll note what I can below for you.  I hope you like it!


Supplies used (at least, those I can remember):
Tim Holtz distress paints
Tim Holtz tissue paper
Fresco white chalk ink
Gesso
Tim Holtz distressed leaf cutting die
Bazzill black border
Tim Holtz rub-ons
The Crafter's Warehouse stencil
The Robin's Nest Dew Drops - mini pink & yellow, regular crystal clear
Sharpie markers - black and white
Stamper's Anonymous clock stamp
Stamp Camp foreign text background stamp
USArt Quest amethyst mica flakes
Terri Sproul mica mixers in rose
Matte finish sealer


Until next time...Happy Crafting!

Wednesday, September 23, 2015

No more boring brown book covers!

Hi everyone!  The start of school means the task of wrapping each book to begin the school year.  My mother used to save up brown paper bags over the summer so that she had enough large paper to do the job.  They were sturdy and gave me an awful lot of room to doodle, but they sure weren't pretty.  I bought a roll of plain white wrapping paper last year from a school fundraiser and today I'm using that as the base of my project.


I cut a sheet of paper large enough (okay, I cut it way too large) to cover the history book.  I chose two different sheets of architectural collage images from Altered Pages and printed them in as full page, 5x7 and 4x6 sizes.  I chose black and white images for a reason.  Each page of images had several square images so I cut each square and inked the edges of each one just to give the book cover a hint of color.   I kept the color consistent for each individual image regardless of size.  The letters were freehand-cut and then inked.


Schoolbooks get handled a lot so you’ll need a pretty strong glue to attach your images to whatever paper you use for a base, whether you choose grocery bags, wrapping paper or store bought book covers.  If you have any edges that are giving you a hard time, either tape them in place or simply glue another image or embellishment over that spot.  I chose to keep these books flat so that they would stack well together on a shelf as well as in a backpack.  There are so many different embellishment choices at Altered Pages that you can be as creative as you choose! 


Composition books all look the same.  Why rummage around in the backpack looking for the right one?  I made a cover from a sheet of computer paper to match the history book.  No more guessing which books are for which class.


Oh, you want to know why I chose black and white images.  If your child is anything like me, these buildings will all be colored in by semester break.


Project supplies:
Vintage Architecture collage sheet
Architechtural Drawings collage sheet
15th Century Alphabet collage sheet
StazOn midi ink pads

Dauber
Thin double-sided adhesive
Black Bazzill Border
Glue Sticks or other adhesive
Seemingly Endless Embellishment Opportunities


Until next time...Happy Crafting!

Sunday, August 16, 2015

Greetings from Michigan!

I have a very special way for you to share that signature recipe that everyone asks you for at every potluck dinner.  Sure, you could write it on a regular index card or type it up on the computer, but if you're like me, new recipes get mixed up with the old ones and lost before you know it.  Why not give the your recipe in a way that makes it a special keepsake so that it isn't misplaced?  Give them your special recipe on a hand decorated piece of art.

Altered Pages has this wonderful set of recipe cards.  It includes a key ring so you can keep them all together.  Make a set of family favorites as a bridal shower gift!  Or use them one at a time as tags on trays of cookies or gift baskets containing your homemade treats. 


The original recipe calls for jarred Maraschino cherries.  Using fresh cherries will shorten their shelf life.
This recipe for Chocolate Covered Cherries is a dandy.  I'm a Michigan girl and love my cherries.  Did you know that approximately 75% of all sour cherries grown in this country comes directly from my home state?  The Traverse City area grows the majority of them and hosts a festival every year to celebrate my favorite fruit.  I decorated this tag in a Michigan theme rather than just cherries, because I intend to use it on a gift basket full of Michigan products.  We're know for more than just our fresh produce.  We love our snacks and treats, too.


Are you in a book or social club?  Or do you work with a bunch of people who love to cook?  Then another fun idea is to give each of your coworkers a blank card and ask for their very favorite recipe.  When you get them back, keep them as a collection and hang the ring on a hook in the kitchen so that they are close at hand.

Products used:
Tags for Recipes
Staz On black ink
Collage sheets
Nori Paste


Stop by the Altered Pages Artsociates blog every day to see where the design team will take you next as we travel across the USA through art.  Please comment daily to share the love with our artists and be entered into the random drawing for a package of vintage postcards and a vintage map.  (value 17.00)


Monday, June 15, 2015

Enjoy a Cuppa Happiness

I love coffee.  I love the smell of it brewing, the taste of a fresh cup with cream and just a hint of sugar, and coffee art!  Here is an altered pocket page that is featured over at the Altered Pages blog.  Please scroll to all the way to the bottom to see a list of supplies used.  There are close up photos at the Altered Pages Artsociates blog of the front and back of the cards. 


There is still plenty of time to sign up and join us in our June swap!  Please read the details below if you are interested.


Join the POCKET ALTERED PAGE Swap
1. Go to https://www.facebook.com/groups/AlteredPagesArtsociates/ On FACEBOOK 
2. At top of the group page the “EVENT” will be pinned. You can access the SWAP via this link. 

3. Or you can click the “events” under the banner to get to the event listings page, and click into the swap.
4. Once you are on the “events” page, you must click up in the upper right hand corner to join the swap.
5. Now you are registered and will be on the list for the swap….this is how you are allowed into the SWAP! At this point you can access the free collage selections for use in your pages.
6. The swap will be open on June 1 and sign ups accepted until June 20.
7. On June 21-- A listing of random partners will be created and posted on the event page June 22.
8. You have until June 30 to mail out your Pocket Altered Pages to your partner.
9. PLEASE connect with your partner to get address information. You may want to decide what kind of Pocket Altered Pages theme/colors/ topic you wish to send to each other.
  
 
Products used in this project:
Glitz paper 77 Collection
Glitz Cashmere Dame stickers
Glitz Laced With Grace stickers
Glitz Beautiful Dreamer stickers
Washi Tape
Coin Envelope
German Scrap
Wink of Stella pen
Black bling
Gold corner stickers
Stickles
Double sided tape
Adhesive Dimensionals
Bazzill mini edges
Clock rubber stamp
Ball fringe, baby size
a few other bits and pieces from my scrap bins
...and of course, a protector page to hold it all!

Altered Pages collages:

Sunday, June 14, 2015

Pocket page full of art cards

Hi everyone!  It's been a while since I posted here.  My apologies.  Most of the cards here for my Pocket Altered Page were straight collages using papers, tapes, embellishments and collage images from Altered Pages so I'm going to keep my explanations short this time.  There are three I'd like to highlight. 

This accordion folds so that there is plenty of room for writing a letter to your pen pal.
A scrap of leftover metal sheeting was large enough to cut out this key embellishment.


Dimensional adhesive squares make a great pocket space on the front of this card.
Scroll all the way to the bottom to see how these all fit together in my Pocket Altered Page and for a list of products.


Front and Back
Front and Back


Front and Back


Front and Back


Envelope to hold little treasures
 
Front and Back
Book Style - Open Outside


Book Style - Open Inside
 
One pocket of Altered Pages collage images and one pocket of paper squares.


They REALLY are!!!
AND, don't forget that you can join us for a fun swap.  We would really love to have you join us.
Here is the info on how to join our swap!  You do not want to miss this.   
 How to join the swap: How to join the AlteredPages.com Pocket Altered Pages swap!
1. Go to https://www.facebook.com/groups/AlteredPagesArtsociates/ On FACEBOOK
2. At top of the group page the “EVENT” will be pinned. You can access the SWAP via this link. ...
3. Or you can click the “events” under the banner to get to the event listings page, and click into the swap.
4. Once you are on the “events” page, you must click up in the upper right hand corner to join the swap.
5. Now you are registered and will be on the list for the swap….this is how you are allowed into the SWAP! At this point you can access the free collage selections for use in your pages.
6. The swap will be open on June 1 and sign ups accepted until June 20.
7. On June 21-- A listing of random partners will be created and posted on the event page June 22.
8. You have until June 30 to mail out your Pocket Altered Page to your partner.
9. PLEASE connect with your partner to get address information. You may want to decide what kind of Pocket Altered Pages theme/colors/ topic you wish to send to each other.

10. International Swappers are invited, however, postage costs will vary from country to country. 


Products used in this project:
Graphic 45 papers - Steampunk Spells (2 designs), Steampunk Postcards, the floral design from the Mermaid Mailbox Muse kit and one other that had the right colors in it.
Glitz Laced With Grace paper - Orange with polka dots
Glitz Uncharted Waters paper - multi-colored polka dots
Glitz Cashmere Dame stickers
Glitz Love Games stickers
Washi Tape
Chipboard gears
German Scrap
Glassine envelope
Wink of Stella pen (on the chipboard gears after inking them)
Gold corner stickers
Double sided tape
Adhesive Dimensionals
Clock stencil and dauber
a few other bits and pieces from my scrap bins
...and of course, a protector page to hold it all!

Altered Pages collages:
Pocket Quotes 2365
Vintage Ships
Steampunk & Science
Tag Alphabet collages
Steampunked Machines (printed on several different colors)

Thanks for stopping by!  It's always nice to have you visit.  Drop me a line in the comments below if you have a moment and say hello! 

Friday, April 10, 2015

Art Journal Fun

Hi everyone!  I can't remember the last time I sat down and just played in my journal.  I've been making cards and canvas projects and those are fun, but art journal time is play time for me!  I received this awesome 2-part lotus stencil from Stencil 1.  I knew it was going to be a large stencil, but I was surprised when it came in the mail.  It's really big.  Just the perfect size for fairies!

I started with a background of Gelatos on a page that was coated with gesso first.  I randomly colored spring colors in patches and then smoothed them out with my fingers before using a spray mister to create some drips.

I wanted a textured background for the flower so I resized the text square to 5x7.  It has a creamy yellow background on its own and then I sprayed it with Dylusions ink in pink and teal.  Once it was dry, I sponged dark purple paint through the detail side of the stencil.  Flowers don't float in mid-air so I made a blue border at the bottom of the page to look like water and glued down the flower.  I added a touch of purple to give the "water" better definition.


I chose to use this beautiful image of a lady in a blue/teal evening gown to be the butterfly princess.  The wings and the bottom of her dress are glued directly to the page and her head and torso are attached with foam circles.  Although it doesn't show on camera, her headpiece is glittery from a Wink Of Stella pen.


There is a collage sheet with a butterfly that matches these fairy wings so I printed that out multiple times in several different sizes.  A spring quote completes the page.


I hope you like it.  If you'd like to know more about the Altered Pages collages I used please follow the link back to the Altered Pages Artsociates blog and check out the full post.

Saturday, March 28, 2015

Feeling Punkish

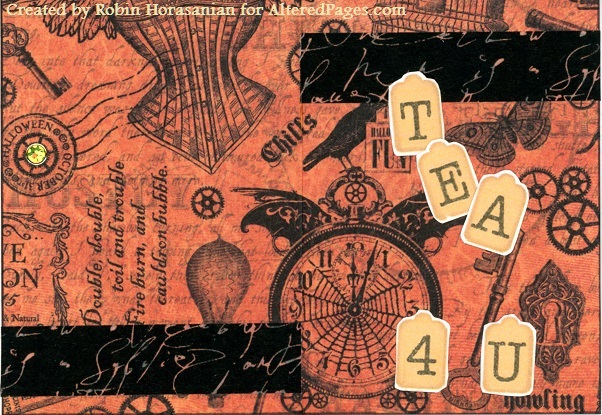
Feeling a little punkish today.  Steampunk-ish, that is!  Steampunk is a little out of my comfort zone but I love the projects my teammates have shared.  Today I started with a wonderful folding card.  the four pages all fold in and the card becomes a box-like square.  Each of the flaps is meant to hold an oversize tag but I haven't started on those yet.  The stencils and cutting dies are from my own collection.  That's really one of the things I love best about the Altered Pages collage sheets.  No matter what your favorite medium, you can incorporate them! 

Each side of this multi-panel card has five 6" x 6" panels and two 2.5" x 6" panels

The small panels fold up inside to create pockets.


I hope you enjoyed today's project.  Stop over by Altered Pages for more info about the images used and to be inspired to create your own art.  Bye for now.