Pages

Showing posts with label art. Show all posts

Friday, March 7, 2014

The end of another long work week

It's the weekend!  That wonderful time when we get to unwind from the long week of putting our noses to the grindstones and our shoulders to the wheels.  (sigh)  I'm ready for it!

I took one of those silly little Facebook quizzes to find out what kind of crafter I am.  It's a game right?  They couldn't possibly know me from 10 questions.  What did I get?  Niche crafter!  And I thought, "Darn it!  I'm trying to break out of my little box!"  Think I'm taking that little quiz seriously now?  Yep!  So this weekend is going to be spent on new-to-me projects.  Yes, I will probably make a card or two as well, but I'm going to try to keep it all new and different. 

I had a new experience this week.  I went to my first class at Painting With A Twist.  So much fun!  I've been thinking about going for a little over a month and when I saw that they had a class on painting the TARDIS I couldn't resist any longer.  One more Doctor Who art project added to my collection.  Did you notice that the windows are wrong?  I was so caught up in the class and trying to do as Jackie suggested that I didn't realize she told us the wrong shape on the windows.  I can go back for their SOS day, but I think I'll try to fix it at home first.  Heaven knows, I have plenty of paint!

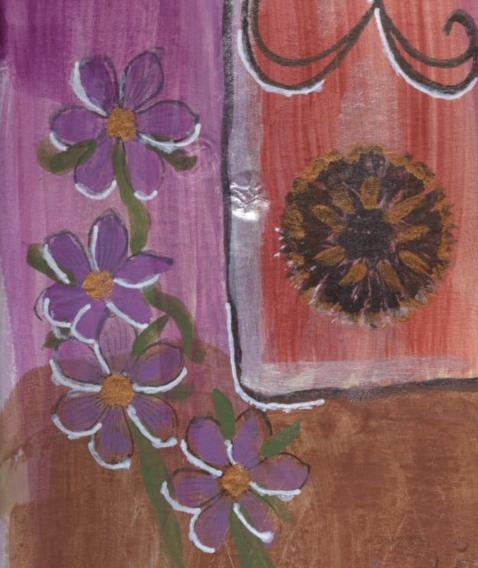
For the first time, I also decided to frame one of my art journal pages.  Surprisingly, there is none of my original art on the walls in my own studio!  I've decided that should change.  I like this pretty floral and decided not to keep it buried in a book.  Plus, my craft room is pink and green so how could I resist?  I was thinking a square of pink Dew Drops around the glass and leaving the rest white.  What do you think?  Keep it white or paint it pink before I start adding the bling? 

And now, before I log off to go and get painty I will leave you with this joke.  It's an old one but it still makes me laugh.  Enjoy...


This "warning" was forwarded to me by a friend.

A recent study indicated that rubber stamps and embossing powders give off certain pheromones that actually hypnotize women and cause them to purchase unreasonable amounts.  When stored in large quantities in enclosed paces, the pheromones (Rubber) cause memory loss and induce the nesting syndrome (similar to the one squirrels have before the onset of winter i.e. storing food), therefore perpetuating their species.  Sound tests have also revealed that the rubber emits a very high pitched sound, heard only by a select few: a breed of women known as "Rubber Stampers". When played backwards on an LP, the sounds are heard as chants, “buy me, stamp me, emboss me."

Studies have also indicated that aliens have inhabited the earth, helping to spread the effects that these Stamps have on the human population.  It's also been experienced that these same pheromones cause a pathological need to hide these Stamp purchases when taken home (or at least blend them into the existing stash), and when asked by a significant other if the stamp is new, the reply is: "I've had it for a while."
 
Have a wonderful weekend!  Drop me a note in the comments below and make my day!

Sunday, June 9, 2013

Be Brave in your art journal

Be Brave and Take a Chance was the theme of this next layout.  My bravery on this layout was mainly the use of mustard yellow!  That color took me out of my comfort zone.  There were a lot of techniques going on for this layout.  Hey, you can catch Terri Sproul's art journal tutorial #3 over on YouTube if you'd like to play along on Tuesdays and make your own brave layout!

First I tore large sections from a sheet of scrapbook paper.  It was a brown paper with copper hexagons.  The brown paper really drove this layout, which is ironic because I used so much paint that it almost doesn't show.  Only the shiny copper really comes through.  That's a shame because it was wonderful paper. 
After the paper was down I spread on a generous amount of Elmer's glue and a little touch of copper color glitter glue.  You have to let that start to dry and then paint over top.  While the paint and glues dry the paint begins to crack and split.  Because the paint got away from me I tried to wipe some of it off.  A couple of things went wrong at this point.  When you blend the glue and paint it doesn't really crack.  Also, because the paper was saturated with paint, when I began wiping it off I was also wiping off the scrapbook pattern!  So I stopped wiping and decided to go with whatever happened.  I sprinkled on a few of the turquoise mica flakes that came in the mail that day.


Because I was being Brave. I wanted to do something different to add interest to the page.  I took my largest mica tile and split it into two pieces so that I could have the same shape on each side of the layout.    The "Be Brave" tile has the yellow paint on the back and the words and my thumbprint on the top.  The "Take A Chance" tile has the yellow paint on top so it's not as shiny.  Both tiles were attached with Helmar 450 glue.
 
After the paint was thoroughly dry I  added a couple sections of USArt Quest's 101 Heavy on two different stencils.  The first was an Asian symbol for energy, which was decorated with their Mica D'Lights.  This wonderful stuff is like glitter, but it's all natural.  It also matched the flakes so I thought it would be a nice burst of color.  I stamped a couple of flowers with glue and added more D'Lights.  Then I added some checkerboard sections just for fun.  I stamped some additional background images and let the whole thing dry...again.
So this is my page.  There is a lot going on and it is different than anything I've ever created.  I like it for that reason alone!  One more step along the new creative path I'm taking.  I hope you like it.  
Please leave me a comment or follow my journey using the links here on the page.  Happy creating!

Wednesday, June 5, 2013

Enjoying the Art Journaling Experience

I was recently chatting with my local stamp store owner about the different types of ink she carries and the many different type of classes she offers.  I brought up the fact that I have recently started journaling and she said that they tried to offer classes in-store but her customers weren't interested.  She said they didn't see the point in it.  I remember thinking the same thing not that long ago.  A lot of her customers are scrapbookers.  And in a way, those are their art journals.  But that got me thinking about why I decided to play along with Terri Sproul for this series of classes. 

When I first started watching Terri's class on Tuesday she was doing a series on altered books.  I love books.  I worked in a library for 14 years and the thought of "destroying" a book just to make art was a little difficult for me to grasp.  But Terri teaches techniques and I can use what I learned in those lessons anytime.  I look forward to her classes and I've enjoyed Tuesday nights even more since I found her online.  And NCIS is on Tuesday so it already had THAT going for it! 

So, why am I making an art journal?

The first reason is that I don't have anything that I've created just for myself.  I'm a card maker so most of the art I've created gets sent away to friends, family and RAK* recipients.  I don't have anything in my own home that I've made for ME.

The second reason is that I really am trying to grow as an artist.  I'm learning techniques, of course, but I'm also learning to be more spontaneous with my projects and to give myself a break for imperfections.  And I've learned the importance of being patient and completing a complex project in stages (without fussing with it while it dries).

This was my second layout in Terri's series titled Plant Positive Seeds.  And what is that you see?  Book pages??!!  That's right.  I've also finally gotten over the idea that tearing pages out of a book is taboo!  I will admit that I held that book in my hand a long time before I could make myself actually rip out a couple.  When it was done, I took a few deep breaths and I was fine. 
The texture on this page comes from several different techniques, including folding the pages together and gently pulling them apart.  I've also made cards in this way and it makes a great textured background.  There are paint drips, stencil patches and a hint of journaling, which was done with mostly stamps.
So now I have art to share with my cards and art to keep in my journal.  Thanks for joining me in another step of my journey.  Now if you'll excuse me, there is some acrylic paint calling my name.

Leave me a comment or follow me using the links on this page.  I'd love to hear from you!

* Random Act of Kindness

Friday, May 24, 2013

Using clip art in cards

First things first, there is nothing wrong with using clip art in any of your projects.  There are a lot of beautiful images available on software and online.  Take full advantage of them!  But let's be clear...to stamp something, means you have to physically apply some sort of medium like ink or paint onto an object and then apply it to paper.  There is no such thing as a digital stamp.  If you print it out, it's clip art.  If it weren't for clip art, I might not have gotten into card making at all!

I really wanted to join in the fun of the Altered Pages Challenge this month.  The theme is shoes.  I love girly cards and thought this one would be fun.  I started going through my stamp drawer to find the perfect image and discovered that I really don't have a shoe stamp that would be a good focal point on a card.  The stamps I own are just too small.  So I went on Google and searched "shoe coloring page" and found this really cute pair of wooden shoes.
I pasted the image into my Print Shop program and printed them out.  I colored the shoes with a coconut-colored Sharpie and then went over it with a colored pencil.  The flowers were painted with Sakura's 3D Crystal Lacquer, which were colored with Terri Sproul's Mixers in Shimmer Rose and Shimmer Green.  The large flowers at the top were embellished with Dew Drops from The Robin's Nest.

To make the flower border, I cropped out the largest flower from the shoe and printed it in various sizes.  I also flipped the image so some would be facing the other way.
 I can't decide if I prefer the scan or the photo so here's both!

Here's another fun card I made with clip art.  This one was for my husband's birthday.  He's a real car guy, but I don't have much in the way of stamps.  It gave me a great opportunity to highlight some of the car embellishments I found, though!
The background is a paint chip.  I love pink and black together and the gray helped blend the buttons and brads into the design.

If you're like me and you want one of every stamp in your collection that's fine.  But if you need an image and you can't find the perfect stamp or can't afford to stockpile them then go find yourself some beautiful clip art.  The joy is in creating!

You can leave me a message or even click the link to follow my blog journey!  Thanks for stopping by!


Wednesday, May 15, 2013

A New Project ... Art Journaling!


I've started two different types of art journals recently.  When Terri Sproul announced that her online class was going to start an art journal series I went out and bought my first book in anticipation!  A book full of blank pages just waiting for me!  It's been a fun first couple of weeks.

I have always been a little intimidated by acrylic paint.  I have at least a dozen of the colorful little bottles and I've used them on card backgrounds, but I have never considered myself a "painter" so they have been sitting around waiting for me to get brave enough to use them.  When I came up with my idea for the first page entitled "My Art Journal", I laughingly told my husband that my brain was always wanting me to do things my hands had trouble doing.  He was very encouraging and told me that of course I could do it and he never doubted that there was an artist in me.  What a wonderful thing to hear!

After the first class, I got out my paints and went to work.  I started by penciling in the bottles freehand.  Then I took a deep breath and painted them!  I completed the background and other little touches over a week. 

I've worked on this page three separate times to add, tweak and FIX!  That's right, when you're learning to do something new, you can count on making mistakes.  But it's not just a journal, it's a journey.  I'm learning new things all the time.  It doesn't have to be perfect.  Mistakes are okay.  You can see the paint bubble in this photo that happened when I was drying the paint on page two.  I used a paintbrush and USArt Quest's PPA glue to seal over the bubble to try and prevent peeling.  Now I have learned not to get too close to the page with my heat tool.  So there it is...page one!  I am very proud of how it turned out.  I'll be posting others soon.


If you need a creative outlet I really recommend starting an art journal.  They're great stress relievers.  I've started a second (smaller) journal that I take to work and draw in on my lunch.  It's filled with doodles and it's a wonderful way to spend a lunch hour.


Drop me a note and let me know where/what you doodle or how you best express your art.  Or you can follow my journey.  Just use one of the links below.  Thanks for stopping by!

Saturday, May 11, 2013

Playing with Mica this week

I found a really cute plastic suncatcher at the dollar store this week and thought to myself, "Gee, I bet that would look pretty filled with Crystal Lacquer!".  So I brought it home and got out my box of Mica products and I also got out my Sakura 3D Crystal Lacquer.  I've used the lacquer on a few jewelry pieces and all of my bezels are gone so I've been trying to find other projects for the beautiful lacquers.  I only have one set so I used what I had and then also mixed up batches using Terri Sproul's mixers and the clear lacquer.  The mica mixers have a different look to them than the others so my suncatcher has different textures.  The pre-made 3D colors are pearly and, although it's hard to tell from this picture, the mixers are a more sparkly effect.  For the sky, I mixed USArt Quest's Mica D'Lights into the clear lacquer.  The D'Lights don't completely color the lacquer so the sky is more opaque and not as glittery as the mixers.  I really like the look and I will be seeking out more of these cute (and cheap!) projects.


 While I had the box of Mica out, I noticed my mica tiles.  I haven't played with them very often and I thought this little one was the perfect size for an ATC.  I grabbed my mocha colored alcohol ink and a Q-tip and darkened the tile up just a little.  Then I added a drop of the ink to the tile and let it spread out naturally.  I smudged some charcoal colored chalk ink around the edges and then stamped a weave pattern with ink very similar in color to the card stock and embossed.  I added another background pattern and a couple of other stamps and glued down the mica on top using clear Crystal Lacquer.  I dipped the edges of the card on the charcoal pad and now I can decide if this one is for trading or if it will go on a card in the future!


I've done a little art journaling this week, as well.  I'll be sharing those pages with you soon.  In the meantime, if you'd like to follow along on the art journal journey (try saying that 5 times fast!) please join Terri Sproul's online classes every Tuesday.  I'm learning a lot and have started using the acrylic paint that has intimidated me in the past!  It's a lot of fun!

Thanks for taking the time to visit me.  Drop me a line or follow my blog with the links at the bottom! 

Saturday, April 13, 2013

It's Nice to Spend a Saturday Crafting

I love it when I can spend a whole day doing nothing but stamping and playing at my craft table. 

For my mom for Mother's Day.  My mother has always liked Asian art.  The large Chinese love symbol is a foam stamp with a small Chinese print stamped around the border.  The same small print stamp is on the black hexagon.  The background paper is from USArt Quest.  It came in a huge sheet so I'll be able to make a lot more from just one page.  I don't have any idea what the border stamp says, but I added it to give the wording a more textured look.  It is embellished with various beads & coins.

This get well card is for a swap over at Creating the Crafty Life.  I love monochromatic cards.  The paper was embossed on my Cuttlebug and then kissed with Colorbox silver ink.  The words are also stamped in silver.  The racecar image is supposed to have that mottled look, which makes it difficult to color so it worked perfectly for this card simply stamped on gray paper.  A gear and brad were added for embellishment.  Inside says: Speedy Recovery!

Finally, I have a card made using the 4th Anniversary sketch from Unscripted Sketches.  The background paper was made with acrylic paints and glitter glue.  Some of the paints are shiny and some are matte.  Squirt paint randomly on 1/2 sheet of card stock and cover with second half.  Use either a brayer or small rolling pin to gently smoosh the paint around and peel apart.  The direction of the peel determines the paint streaks.  This card is embellished with gold paper ribbon, an old necklace charm and some Dew Drops from The Robin's Nest.

Go on, get out there and create!

If you like my blog, you can click the little button at the bottom to follow me.  You can also leave me a comment!  I'd love to hear from you.  :-)

Friday, February 22, 2013

Retirement Party Memory Box

A friend and co-worker is retiring next week.  She is over-the-moon excited to start the next leg of her journey as she joins her husband, who is already enjoying his own retirement.  A few of the girls wanted to do something special for her party.  We've all seen this idea all over Pinterest, but here is my offering for a memory box.

A sturdy cardboard box and napkin collage supplies
I chose a box with a flap so I collaged the entire thing even though it will be tucked inside.
I cut a hole large enough to easily insert 4x6 cards at the start of the project, then added my collage pieces.
Card choices are: Bon Voyage, Memories, & Best Wishes.  I just need to decide if I'm going to decorate them with more stamps.  I got out a dragonfly stamp, but I haven't decided yet.
I made a little panel to cover the hole.  It is embellished with a chipboard dragonfly and Dew Drops.
New piece added 2/24 - sign made to encourage party-goers to drop a note in the box.
One last piece to pull everything together.  A card to complete the set.

So there it is.  I hope she enjoys reading all of the notes her friends & co-workers leave at her party.  Drop me a line and let me know what you think or just say hello! There is a link at the bottom of the page if you'd like to follow my blog.  Until next time...Happy Stamping!

Monday, February 18, 2013

New Project Takes Me Out Of My Comfort Zone

I recently joined a new online crafting group called Creating the Crafty Life.  When I started my journey to try new things and grow I knew that finding a new group of friends with widely varying tastes and styles would help me stretch in a supportive environment.  I joined a couple of online classes.  On Tuesdays, I attend the Helmar tutorial and Terri Sproul's mixed media technique classes.  I've also been enjoying the Saturday Crafts Fair with so many different classes!  But I've mainly been an observer.  This week, I signed up for my first mixed media swap.  I chose a project that is nothing like anything I've ever done before.  The challenge was to create one canvas in a Shabby Chic theme.  Exciting ... and terrifying!  I mean, what if I couldn't pull it off?!  I've never done a canvas before and I had to Google "shabby chic" to even figure out some basic guidelines. 

I lightly brushed beige acrylic paint over the white canvas and a floral background was very lightly sponged over the beige.  I was hoping for an aged, distressed look.  One of the bullet points for shabby chic, says Google.

I've never altered chipboard die-cuts before.  The letters started out with shiny designs.  I used an emery board to sand them a little, then painted them with barn red acrylic paint.  When that was completely dry, I used my brayer to evenly coat my crinkle background stamp to make them seem aged.  The Fleur de Lis die-cut started out plain cardboard.  I used USArtQuest's 101 Light and a checkerboard stencil to give it a little texture.  I painted that in yew green matte acrylic paint and then lightly sanded over the tops of the checkerboard with my trusty emery board to allow some of the white to show through.  The vine chipboard was simply painted yew green.  I left it solid rather than altering it further.


The flowers were part of a scrapbooking kit I received as a gift years ago.  I sponged on dark red ink to give them a little interest and to help bring the red lace into the design in a different way.  The Robin's Nest Dew Drops were added for the flower centers.
I've never trimmed anything in lace before and this canvas has two different types.  The wide lace is a single piece glued all the way around the canvas using Helmar's 450 Quick Drying Adhesive.  The thicker but narrow ribbon is 4 pieces glued on top of that to hide the edge.

So there it is!  My very first mixed media piece!!  I'm very proud of it and very proud of myself for tackling something new.  I hope you like it!

Supplies Used:
Pretreated Canvas from JoAnn Fabrics
Acrylic Paints
USArtQuest 101 Light Artist's Cement
The Robin's Nest Dew Drops (different color than pictured below)
Stencils
Chipboard Shapes
Paper Flowers
Lace

Drop me a note sometime!  There's even a link at the bottom of the page if you'd like to follow my blog.  Until next time...Happy Stamping!

Saturday, January 19, 2013

Growing, trying new things

I have to laugh at myself.  I tell you all that I'm a rubber stamper and then post my new projects ... which don't include stamping.  I really am a stamper at heart.  Honest!  But I've been trying to broaden my horizons.  I have been attending online demos every week by Terri Sproul, who teaches mixed media techniques.  I've been attending the Saturday Crafts Fair and I've made lots of new friends on Facebook.  I've discovered craft companies I had never heard of.  It's been fun and it's been rejuvenating!

I've always liked learning new things and Facebook can be awesome for that if you let it.  I'm hoping that you will all enjoy my journey with me and like seeing the artwork I hope to create along the way.

You may have noticed that my new favorite project involves napkin collage.  Joe Rotella has an awesome YouTube demo and I just had to give it a try.  Today's projects are all gifts.  I completed one frame and the other two projects I had intended to do today are almost done.

I still need to work on adding finishing touches to my collages.  So far, it's been just adding a dusting of fine glitter.  I'll get there.  Like everything else, I'm going to have to hold my breath and dive right in.

Maybe tomorrow.

 
Wooden frames & birdhouse with a coat of acrylic paint.  All ready to go!
For Linda
UPDATE: The Day After

Here are the other projects I worked on yesterday.  A couple of them were unfinished and a couple were still drying last night when I made my post.
These are all gifts.
And look - I took the plunge and added embellishments!!
Robin's Birdhouse - the original
For Donna
Making art to share with friends and family.  What a wonderful way to spend a Saturday!


Practice Random Acts of Kindness and Senseless Acts of Beauty

Wednesday, January 16, 2013

Goodies in the mail

I feel like it's Christmas again!  I've gotten three packages of beautiful new things to play with this week.  First was a new craft mat and a couple of stamps from Altered Pages .  Then on Monday I received my January challenge kit and several bottles of Dew Drops from The Robin's Nest.  They are my new favorite embellishment!  I made a card to enter into their blog contest.  You can make scrapbook pages, cards or mixed media projects.  I haven't scrapped in so long that I drew a blank looking at the layout, but projects aren't due until Feb. 15th so I may join that challenge, too.  And today I received my gem kit from Sakura and a couple of Terri Sproul's mixers.  I'm going to try my hand at making a couple of pendants this weekend.  What fun!  It's all part of my decision to spend more time being creative.  Here's my card for the sketch challenge.  Let me know what you think in the comments below.  I'd love to hear about your art projects, too!