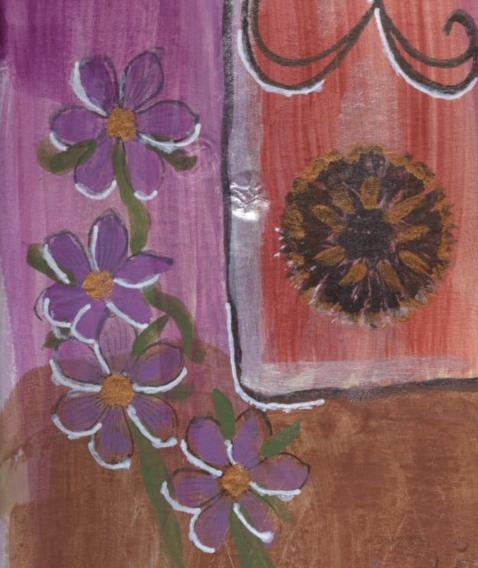
The roses in this case are napkins and they help bring my Garden of Dreams layout to life.
This double page features a lot of greens and browns. I made this background knowing that one of the techniques that Terri Sproul highlighted in this lesson was using napkins to enhance the page. But when I was done with the painted background I thought it was going to be too dark and too busy. In the past, I would have scrapped the idea and made another but I really wanted to see where this would take me. Before the paint could dry I added a sprinkling of gold Mica D'Lights so the page would have a very light sparkle.
I started my napkin collage with a tan and cream floral napkin to try and soften up some of the dark swirls. Some of the pieces of this pattern and one of the large flowers were stamped with a handwriting image and allowed to dry before being decoupaged onto the page. These were the napkins I chose.
After the tan floral, I added two of the large lilies and two roses. A marble pattern was stamped in gold to add a little depth to the background. I wanted more of a garden feel to the page and because of the dark background the napkins weren't as prominent as I'd hoped. No problem! I grabbed a stencil and some of my USArt Quest 101 Light and added some vines. While the paste was still wet I sprinkled Mica Delights in ruby and green.
A green Bic Mark-It was used to highlight the vine and a red one was used to highlight the circles to match the mica used on each. After that, I stamped bees in cream colored acrylic paint and dragonflies using a brown Faber-Castell Gelato.
Terri's original theme was "Dream Big" but it just didn't seem to fit my page so I changed the title to "Garden of Dreams". I chose a font from my computer and printed it out to use as a guide for how to draw each letter. The same Bic Mark-It that was used on the vine was used for the letters. And voila!
Thanks for joining me once again! Please drop me a line or use one of the links to follow my blog journey or add me to your Google circle! Have a wonderful day!
I'm a rubber stamper who is trying to learn new techniques and broaden my crafting horizon. These are my thoughts and projects along the way.
Friday, June 14, 2013
Sunday, June 9, 2013
Be Brave in your art journal
Be Brave and Take a Chance was the theme of this next layout. My bravery on this layout was mainly the use of mustard yellow! That color took me out of my comfort zone. There were a lot of techniques going on for this layout. Hey, you can catch Terri Sproul's art journal tutorial #3 over on YouTube if you'd like to play along on Tuesdays and make your own brave layout!
First I tore large sections from a sheet of scrapbook paper. It was a brown paper with copper hexagons. The brown paper really drove this layout, which is ironic because I used so much paint that it almost doesn't show. Only the shiny copper really comes through. That's a shame because it was wonderful paper.
After the paper was down I spread on a generous amount of Elmer's glue and a little touch of copper color glitter glue. You have to let that start to dry and then paint over top. While the paint and glues dry the paint begins to crack and split. Because the paint got away from me I tried to wipe some of it off. A couple of things went wrong at this point. When you blend the glue and paint it doesn't really crack. Also, because the paper was saturated with paint, when I began wiping it off I was also wiping off the scrapbook pattern! So I stopped wiping and decided to go with whatever happened. I sprinkled on a few of the turquoise mica flakes that came in the mail that day.
Because I was being Brave. I wanted to do something different to add interest to the page. I took my largest mica tile and split it into two pieces so that I could have the same shape on each side of the layout. The "Be Brave" tile has the yellow paint on the back and the words and my thumbprint on the top. The "Take A Chance" tile has the yellow paint on top so it's not as shiny. Both tiles were attached with Helmar 450 glue.
After the paint was thoroughly dry I added a couple sections of USArt Quest's 101 Heavy on two different stencils. The first was an Asian
symbol for energy, which was decorated with their Mica D'Lights. This
wonderful stuff is like glitter, but it's all natural. It also matched
the flakes so I thought it would be a nice burst of color. I stamped a
couple of flowers with glue and added more D'Lights. Then I added some
checkerboard sections just for fun. I stamped some additional
background images and let the whole thing dry...again.
Please leave me a comment or follow my journey using the links here on the page. Happy creating!
First I tore large sections from a sheet of scrapbook paper. It was a brown paper with copper hexagons. The brown paper really drove this layout, which is ironic because I used so much paint that it almost doesn't show. Only the shiny copper really comes through. That's a shame because it was wonderful paper.
After the paper was down I spread on a generous amount of Elmer's glue and a little touch of copper color glitter glue. You have to let that start to dry and then paint over top. While the paint and glues dry the paint begins to crack and split. Because the paint got away from me I tried to wipe some of it off. A couple of things went wrong at this point. When you blend the glue and paint it doesn't really crack. Also, because the paper was saturated with paint, when I began wiping it off I was also wiping off the scrapbook pattern! So I stopped wiping and decided to go with whatever happened. I sprinkled on a few of the turquoise mica flakes that came in the mail that day.
Because I was being Brave. I wanted to do something different to add interest to the page. I took my largest mica tile and split it into two pieces so that I could have the same shape on each side of the layout. The "Be Brave" tile has the yellow paint on the back and the words and my thumbprint on the top. The "Take A Chance" tile has the yellow paint on top so it's not as shiny. Both tiles were attached with Helmar 450 glue.
So this is my page. There is a lot going on and it is different than
anything I've ever created. I like it for that reason alone! One more
step along the new creative path I'm taking. I hope you like it.
Wednesday, June 5, 2013
Enjoying the Art Journaling Experience
I was recently chatting with my local stamp store owner about the different types of ink she carries and the many different type of classes she offers. I brought up the fact that I have recently started journaling and she said that they tried to offer classes in-store but her customers weren't interested. She said they didn't see the point in it. I remember thinking the same thing not that long ago. A lot of her customers are scrapbookers. And in a way, those are their art journals. But that got me thinking about why I decided to play along with Terri Sproul for this series of classes.
When I first started watching Terri's class on Tuesday she was doing a series on altered books. I love books. I worked in a library for 14 years and the thought of "destroying" a book just to make art was a little difficult for me to grasp. But Terri teaches techniques and I can use what I learned in those lessons anytime. I look forward to her classes and I've enjoyed Tuesday nights even more since I found her online. And NCIS is on Tuesday so it already had THAT going for it!
So, why am I making an art journal?
The first reason is that I don't have anything that I've created just for myself. I'm a card maker so most of the art I've created gets sent away to friends, family and RAK* recipients. I don't have anything in my own home that I've made for ME.
The second reason is that I really am trying to grow as an artist. I'm learning techniques, of course, but I'm also learning to be more spontaneous with my projects and to give myself a break for imperfections. And I've learned the importance of being patient and completing a complex project in stages (without fussing with it while it dries).
This was my second layout in Terri's series titled Plant Positive Seeds. And what is that you see? Book pages??!! That's right. I've also finally gotten over the idea that tearing pages out of a book is taboo! I will admit that I held that book in my hand a long time before I could make myself actually rip out a couple. When it was done, I took a few deep breaths and I was fine.
The texture on this page comes from several different techniques, including folding the pages together and gently pulling them apart. I've also made cards in this way and it makes a great textured background. There are paint drips, stencil patches and a hint of journaling, which was done with mostly stamps.
So now I have art to share with my cards and art to keep in my journal. Thanks for joining me in another step of my journey. Now if you'll excuse me, there is some acrylic paint calling my name.
Leave me a comment or follow me using the links on this page. I'd love to hear from you!
* Random Act of Kindness
When I first started watching Terri's class on Tuesday she was doing a series on altered books. I love books. I worked in a library for 14 years and the thought of "destroying" a book just to make art was a little difficult for me to grasp. But Terri teaches techniques and I can use what I learned in those lessons anytime. I look forward to her classes and I've enjoyed Tuesday nights even more since I found her online. And NCIS is on Tuesday so it already had THAT going for it!
So, why am I making an art journal?
The first reason is that I don't have anything that I've created just for myself. I'm a card maker so most of the art I've created gets sent away to friends, family and RAK* recipients. I don't have anything in my own home that I've made for ME.
The second reason is that I really am trying to grow as an artist. I'm learning techniques, of course, but I'm also learning to be more spontaneous with my projects and to give myself a break for imperfections. And I've learned the importance of being patient and completing a complex project in stages (without fussing with it while it dries).
This was my second layout in Terri's series titled Plant Positive Seeds. And what is that you see? Book pages??!! That's right. I've also finally gotten over the idea that tearing pages out of a book is taboo! I will admit that I held that book in my hand a long time before I could make myself actually rip out a couple. When it was done, I took a few deep breaths and I was fine.
The texture on this page comes from several different techniques, including folding the pages together and gently pulling them apart. I've also made cards in this way and it makes a great textured background. There are paint drips, stencil patches and a hint of journaling, which was done with mostly stamps.
So now I have art to share with my cards and art to keep in my journal. Thanks for joining me in another step of my journey. Now if you'll excuse me, there is some acrylic paint calling my name.
Leave me a comment or follow me using the links on this page. I'd love to hear from you!
* Random Act of Kindness
Friday, May 24, 2013
Using clip art in cards
First things first, there is nothing wrong with using clip art in any of your projects. There are a lot of beautiful images available on software and online. Take full advantage of them! But let's be clear...to stamp something, means you have to physically apply some sort of medium like ink or paint onto an object and then apply it to paper. There is no such thing as a digital stamp. If you print it out, it's clip art. If it weren't for clip art, I might not have gotten into card making at all!
I really wanted to join in the fun of the Altered Pages Challenge this month. The theme is shoes. I love girly cards and thought this one would be fun. I started going through my stamp drawer to find the perfect image and discovered that I really don't have a shoe stamp that would be a good focal point on a card. The stamps I own are just too small. So I went on Google and searched "shoe coloring page" and found this really cute pair of wooden shoes.
I pasted the image into my Print Shop program and printed them out. I colored the shoes with a coconut-colored Sharpie and then went over it with a colored pencil. The flowers were painted with Sakura's 3D Crystal Lacquer, which were colored with Terri Sproul's Mixers in Shimmer Rose and Shimmer Green. The large flowers at the top were embellished with Dew Drops from The Robin's Nest.
To make the flower border, I cropped out the largest flower from the shoe and printed it in various sizes. I also flipped the image so some would be facing the other way.
I can't decide if I prefer the scan or the photo so here's both!
Here's another fun card I made with clip art. This one was for my husband's birthday. He's a real car guy, but I don't have much in the way of stamps. It gave me a great opportunity to highlight some of the car embellishments I found, though!
The background is a paint chip. I love pink and black together and the gray helped blend the buttons and brads into the design.
If you're like me and you want one of every stamp in your collection that's fine. But if you need an image and you can't find the perfect stamp or can't afford to stockpile them then go find yourself some beautiful clip art. The joy is in creating!
You can leave me a message or even click the link to follow my blog journey! Thanks for stopping by!
I really wanted to join in the fun of the Altered Pages Challenge this month. The theme is shoes. I love girly cards and thought this one would be fun. I started going through my stamp drawer to find the perfect image and discovered that I really don't have a shoe stamp that would be a good focal point on a card. The stamps I own are just too small. So I went on Google and searched "shoe coloring page" and found this really cute pair of wooden shoes.
I pasted the image into my Print Shop program and printed them out. I colored the shoes with a coconut-colored Sharpie and then went over it with a colored pencil. The flowers were painted with Sakura's 3D Crystal Lacquer, which were colored with Terri Sproul's Mixers in Shimmer Rose and Shimmer Green. The large flowers at the top were embellished with Dew Drops from The Robin's Nest.
To make the flower border, I cropped out the largest flower from the shoe and printed it in various sizes. I also flipped the image so some would be facing the other way.
I can't decide if I prefer the scan or the photo so here's both!
The background is a paint chip. I love pink and black together and the gray helped blend the buttons and brads into the design.
If you're like me and you want one of every stamp in your collection that's fine. But if you need an image and you can't find the perfect stamp or can't afford to stockpile them then go find yourself some beautiful clip art. The joy is in creating!
You can leave me a message or even click the link to follow my blog journey! Thanks for stopping by!
Saturday, May 18, 2013
Dew Drops - my favorite new embellishment!
Anyone who looked in my craft cabinet might think I have a lot of embellishment opportunities. I have buttons & glitter, of course. Who doesn't? I have beads and stray jewelry items. I have cancelled stamps, stickers and gem stones. And I have Dew Drops!
The Robin's Nest has been around for a long time but I just discovered them last year. And I love them. I have a rainbow of these lovely little half round beads. I also have a wish list because they come in so many different colors and sizes.
I was looking through my bin of spare card parts and found this pretty daisy background and thought it was the perfect design for my new little embellishments.
The yellow card stock was stamped with yellow pigment ink and embossed with fine, clear powder. And then tossed into a bin for a couple of years. ha-ha So tonight I took my white paint marker and colored the inside of each tiny daisy petal. I sorted out tiny yellow Dew Drops out of the Getaway color mix and glued one inside each of the flowers using Helmar's Gemstone Glue.
A touch of yellow & white ribbon and another daisy stamped on white and embellished completed the springy card.
Here are a couple of other recent cards that were also made from card parts. The first one is a background made with acrylic paint and glitter glue. The embellishment is a charm I picked up somewhere a long, long time ago. I don't even remember where I found it. The Dew Drops help balance the card. Without another dimensional embellishment, the charm would look too heavy on the card.
This next one has been floating around half-complete for quite some time. It's a background of collaged papers with a piece of yarn, a button & a charm. The Dew Drops were added just to give it a sort of framed look.
And this last one is with my favorite panda stamp. Grey Wolf Graphics has awesome animal stamps. I grabbed the Chinese writing background out of the same bin as the daisy paper. I chose Dew Drops to blend with the color scheme and fill in the blank space.
Thanks for stopping by. Please leave a comment or click the link to follow my blog!
The Robin's Nest has been around for a long time but I just discovered them last year. And I love them. I have a rainbow of these lovely little half round beads. I also have a wish list because they come in so many different colors and sizes.
I was looking through my bin of spare card parts and found this pretty daisy background and thought it was the perfect design for my new little embellishments.
The yellow card stock was stamped with yellow pigment ink and embossed with fine, clear powder. And then tossed into a bin for a couple of years. ha-ha So tonight I took my white paint marker and colored the inside of each tiny daisy petal. I sorted out tiny yellow Dew Drops out of the Getaway color mix and glued one inside each of the flowers using Helmar's Gemstone Glue.
A touch of yellow & white ribbon and another daisy stamped on white and embellished completed the springy card.
Here are a couple of other recent cards that were also made from card parts. The first one is a background made with acrylic paint and glitter glue. The embellishment is a charm I picked up somewhere a long, long time ago. I don't even remember where I found it. The Dew Drops help balance the card. Without another dimensional embellishment, the charm would look too heavy on the card.
This next one has been floating around half-complete for quite some time. It's a background of collaged papers with a piece of yarn, a button & a charm. The Dew Drops were added just to give it a sort of framed look.
And this last one is with my favorite panda stamp. Grey Wolf Graphics has awesome animal stamps. I grabbed the Chinese writing background out of the same bin as the daisy paper. I chose Dew Drops to blend with the color scheme and fill in the blank space.
Thanks for stopping by. Please leave a comment or click the link to follow my blog!
Wednesday, May 15, 2013
A New Project ... Art Journaling!
I've started two different types of art journals recently. When Terri Sproul announced that her online class was going to start an art journal series I went out and bought my first book in anticipation! A book full of blank pages just waiting for me! It's been a fun first couple of weeks.
I have always been a little intimidated by acrylic paint. I have at least a dozen of the colorful little bottles and I've used them on card backgrounds, but I have never considered myself a "painter" so they have been sitting around waiting for me to get brave enough to use them. When I came up with my idea for the first page entitled "My Art Journal", I laughingly told my husband that my brain was always wanting me to do things my hands had trouble doing. He was very encouraging and told me that of course I could do it and he never doubted that there was an artist in me. What a wonderful thing to hear!
After the first class, I got out my paints and went to work. I started by penciling in the bottles freehand. Then I took a deep breath and painted them! I completed the background and other little touches over a week.
I've worked on this page three separate times to add, tweak and FIX! That's right, when you're learning to do something new, you can count on making mistakes. But it's not just a journal, it's a journey. I'm learning new things all the time. It doesn't have to be perfect. Mistakes are okay. You can see the paint bubble in this photo that happened when I was drying the paint on page two. I used a paintbrush and USArt Quest's PPA glue to seal over the bubble to try and prevent peeling. Now I have learned not to get too close to the page with my heat tool. So there it is...page one! I am very proud of how it turned out. I'll be posting others soon.
If you need a creative outlet I really recommend starting an art journal. They're great stress relievers. I've started a second (smaller) journal that I take to work and draw in on my lunch. It's filled with doodles and it's a wonderful way to spend a lunch hour.
Drop me a note and let me know where/what you doodle or how you best express your art. Or you can follow my journey. Just use one of the links below. Thanks for stopping by!
Saturday, May 11, 2013
Playing with Mica this week
I found a really cute plastic suncatcher at the dollar store this week and thought to myself, "Gee, I bet that would look pretty filled with Crystal Lacquer!". So I brought it home and got out my box of Mica products and I also got out my Sakura 3D Crystal Lacquer. I've used the lacquer on a few jewelry pieces and all of my bezels are gone so I've been trying to find other projects for the beautiful lacquers. I only have one set so I used what I had and then also mixed up batches using Terri Sproul's mixers and the clear lacquer. The mica mixers have a different look to them than the others so my suncatcher has different textures. The pre-made 3D colors are pearly and, although it's hard to tell from this picture, the mixers are a more sparkly effect. For the sky, I mixed USArt Quest's Mica D'Lights into the clear lacquer. The D'Lights don't completely color the lacquer so the sky is more opaque and not as glittery as the mixers. I really like the look and I will be seeking out more of these cute (and cheap!) projects.
While I had the box of Mica out, I noticed my mica tiles. I haven't played with them very often and I thought this little one was the perfect size for an ATC. I grabbed my mocha colored alcohol ink and a Q-tip and darkened the tile up just a little. Then I added a drop of the ink to the tile and let it spread out naturally. I smudged some charcoal colored chalk ink around the edges and then stamped a weave pattern with ink very similar in color to the card stock and embossed. I added another background pattern and a couple of other stamps and glued down the mica on top using clear Crystal Lacquer. I dipped the edges of the card on the charcoal pad and now I can decide if this one is for trading or if it will go on a card in the future!
I've done a little art journaling this week, as well. I'll be sharing those pages with you soon. In the meantime, if you'd like to follow along on the art journal journey (try saying that 5 times fast!) please join Terri Sproul's online classes every Tuesday. I'm learning a lot and have started using the acrylic paint that has intimidated me in the past! It's a lot of fun!
Thanks for taking the time to visit me. Drop me a line or follow my blog with the links at the bottom!
While I had the box of Mica out, I noticed my mica tiles. I haven't played with them very often and I thought this little one was the perfect size for an ATC. I grabbed my mocha colored alcohol ink and a Q-tip and darkened the tile up just a little. Then I added a drop of the ink to the tile and let it spread out naturally. I smudged some charcoal colored chalk ink around the edges and then stamped a weave pattern with ink very similar in color to the card stock and embossed. I added another background pattern and a couple of other stamps and glued down the mica on top using clear Crystal Lacquer. I dipped the edges of the card on the charcoal pad and now I can decide if this one is for trading or if it will go on a card in the future!
I've done a little art journaling this week, as well. I'll be sharing those pages with you soon. In the meantime, if you'd like to follow along on the art journal journey (try saying that 5 times fast!) please join Terri Sproul's online classes every Tuesday. I'm learning a lot and have started using the acrylic paint that has intimidated me in the past! It's a lot of fun!
Thanks for taking the time to visit me. Drop me a line or follow my blog with the links at the bottom!
Subscribe to:
Posts (Atom)