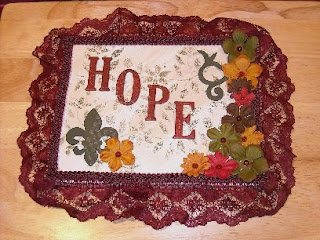
I lightly brushed beige acrylic paint over the white canvas and a floral background was very lightly sponged over the beige. I was hoping for an aged, distressed look. One of the bullet points for shabby chic, says Google.
I've never altered chipboard die-cuts before. The letters started out with shiny designs. I used an emery board to sand them a little, then painted them with barn red acrylic paint. When that was completely dry, I used my brayer to evenly coat my crinkle background stamp to make them seem aged. The Fleur de Lis die-cut started out plain cardboard. I used USArtQuest's 101 Light and a checkerboard stencil to give it a little texture. I painted that in yew green matte acrylic paint and then lightly sanded over the tops of the checkerboard with my trusty emery board to allow some of the white to show through. The vine chipboard was simply painted yew green. I left it solid rather than altering it further.
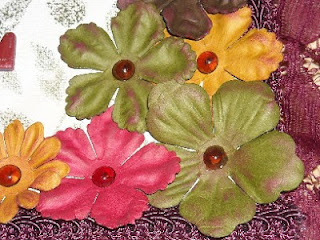
The flowers were part of a scrapbooking kit I received as a gift years ago. I sponged on dark red ink to give them a little interest and to help bring the red lace into the design in a different way. The Robin's Nest Dew Drops were added for the flower centers.
I've never trimmed anything in lace before and this canvas has two different types. The wide lace is a single piece glued all the way around the canvas using Helmar's 450 Quick Drying Adhesive. The thicker but narrow ribbon is 4 pieces glued on top of that to hide the edge.
So there it is! My very first mixed media piece!! I'm very proud of it and very proud of myself for tackling something new. I hope you like it!
Supplies Used:
Pretreated Canvas from JoAnn Fabrics
Acrylic Paints
USArtQuest 101 Light Artist's Cement
The Robin's Nest Dew Drops (different color than pictured below)
Stencils
Chipboard Shapes
Paper Flowers
Lace
Drop me a note sometime! There's even a link at the bottom of the page if you'd like to follow my blog. Until next time...Happy Stamping!


love this and congratulations on your creation!
ReplyDelete