Pages

Showing posts with label Halloween. Show all posts

Friday, October 26, 2018

Happy Halloween!

I love this time of year!  I know for a lot of people Halloween means decorating their home inside and out, but for me it is a great time to make spooky art.  DIY Design Studio has several fun Halloween collages for your art projects.


Both of my cards started out with plain card stock and a piece of punchinella.  Green ink with green paper and white ink with black paper...just to give the blank space a little texture.


I used a strip of washi tape for a background element but a strip of scrapbook paper or a piece of ribbon would also be great.  I just wanted something fun behind the main collage image.


I added a few highlights to the Halloween damsel with a white gel pen.  There is shading on the pumpkin eyes and noses.  And tracing around the skull and crossbones on her cloak and the grid on her dress really make them stand out.  


A few Dew Drops make a nice dimensional highlight.  


For the card below, I used the washi tape again and also added embellishments to the skeleton's crown.


Be sure to come back again soon for another DIY Design Studio project!  Happy Halloween!


Friday, October 12, 2018

Halloween Pocket Page, part two

As promised, I have the flip side of my altered pocket page for Halloween.  For this side, I used all black and white collage images from Altered Pages.


In my first post for this project, I told you how I try to blend in the white edges of the paper with ink on color collages.  The rule is not as hard and fast with black and white images. Sometimes you need a fine line of paper around the image to make it stand out.  If you layer all black and grey images without the little "halo" you might not see everything.  


As with the color collages, paper matters.  I used white paper for everything on this project.  I like black and white images for Halloween because they somehow just feel spookier! 


Saturday, September 1, 2018

Halloween Pocket Page, part one

If you haven't yet searched for Halloween goodies at Altered Pages then please let me recommend them to you!  There are collage images of every type so whatever type of project you're making, you won't be disappointed.  Which Halloween collage did I use for this project?  All of them.  Well, it seems that way.  Let me explain.


When you're making an altered pocket page project you need a lot of collages to work with.  So I printed off each of the Halloween collages that I've collected over the years and cut them apart while my husband and I watched baseball.  That way, I could work on a project, still have our time together, and because I wasn't coloring or assembling, I could put it down and pick it up with ease.


When you are printing your images at home, you control the size and color.  I printed a couple different sizes for each page and I also used a couple of different color papers.  It's important to keep in mind that the ink will appear different on each paper as well as having the background darker or lighter.


Another tip that I'd like to share is that it's important to ink the edges of each image to help them blend together to be more cohesive.  You can use an ink page, dauber, cotton swab...any method you choose.  The goal is just to mask the color of the paper.


It's also important to judge how to use your "white space".  This golden card stock was very plain so I just added very light dots to give it a little hint of color.  You can go with a fancy pattern or just use what's close at hand.  I chose this little foam disk.  It's one of those self stick things you put on the bottom of lamps and things to keep them from scratching your furniture.  I had to buy a big pack and had a few left over.


Some images may not fit perfectly on such a small project.  Pocket projects are a series of nine ATCs on each side and they measure only 2.5 x 3.5 each.  I kept the mitered edges of the frame on the image below, trimmed the picture down and reattached them so I get the same feel and it fits on my card. 


So, how do I decide which images to use?  I go for the main image that I like and then pick out smaller things to fill in like cats and bats from other pictures.  


And here is side one, complete in their little pockets.  I hope you'll come back to see the flip side next time!!


Sunday, December 24, 2017

A Christmas Present for a Friend

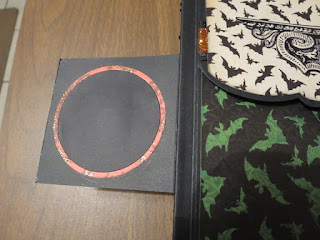
Is December an odd time to post a Halloween project?  Maybe, but this one has been TOP SECRET since June!!  Now that it has been given to my friend Amy I can finally share it with you, too!  The book itself and most of the pockets came from Heartfelt Creations, but the decorations are from everywhere!  


BOOK COVER


PAGES 1 & 2


Pages 3 & 4


Pages 5 & 6


Pages 6 & 7


Pages 8 & 9


Pages 10-11


Back Cover


Book "Latch" 
(Magnetic Closure)


Close up of the large tags in this project